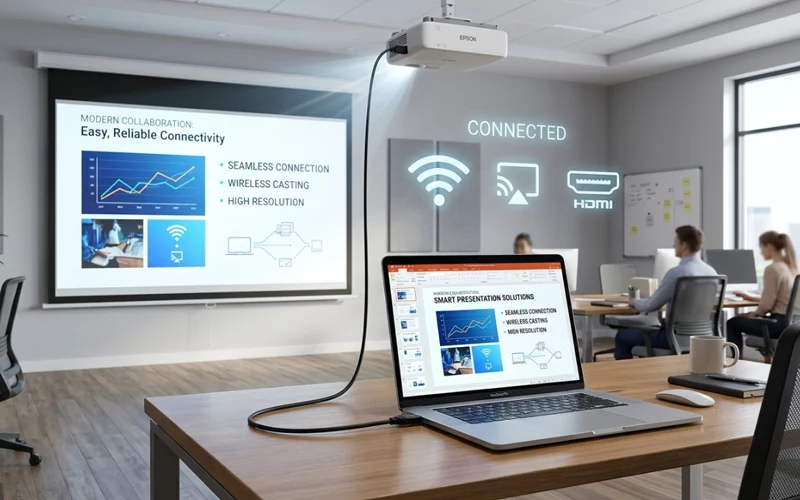
Connecting a laptop to a projector is one of the easiest ways to share your screen for meetings, classrooms, movies, training sessions, and presentations. Still, many people get stuck because the laptop does not detect the projector, the display looks blurry, or the wrong input mode is selected. The good news is that once you understand the basic connection methods, the process becomes simple.
In this guide, you will learn how to connect laptop to projector in different ways, including both wired and wireless methods. You will also find clear steps for HDMI connections, setups without HDMI, and wireless display options, along with other common ways to get your projector working. The explanation is kept in simple English so anyone can follow it easily without confusion.
Why Projector Setup Matters
A projector can turn a small laptop screen into a large and clear display. That makes it useful for business presentations, school lectures, office meetings, home theater use, and even gaming in some cases. But the connection method depends on the ports available on your laptop and projector.
Some laptops use HDMI, some older models may still rely on VGA or USB adapters, and many modern devices also support wireless casting. That is why it helps to know more than one method. When one option does not work, another often does.
Before You Start
Before connecting, check the available ports on both devices. Look at your laptop and projector carefully. If both devices come with HDMI ports, it is generally the simplest and quickest way to connect them. If your laptop is older or your projector uses different input types, you may need an adapter or a wireless solution.
Also make sure the display unit is powered on, the lamp is working, and the correct input source is selected. Sometimes the issue is not the cable at all. It is simply that the display unit is still set to another input like VGA, USB, or AV.
Connecting via HDMI Cable
The most common and reliable method is how to connect laptop to projector with hdmi. HDMI carries both video and sound, so it is a clean solution for most modern laptops and projectors.
To do this, plug one end of the HDMI cable into your laptop and the other end into the projection unit. Then turn on the visual device and set its input source to HDMI. On your laptop, press the display key combination if needed, or open display settings and choose duplicate, extend, or second screen only.
In many cases, the picture appears automatically after a few seconds. If it does not, check the cable, make sure it is fully inserted, and try another HDMI port if the projector has more than one. HDMI is usually the best choice because it is simple, stable, and does not need extra software.
Setup Without HDMI Cable
Not every device has HDMI. That is why many people search for how to connect laptop to projector without hdmi. This is still possible, but you may need a different cable or adapter depending on the available ports.
Older laptops may have VGA, while some projectors support DisplayPort, DVI, or USB-based input. If your laptop has no HDMI port, you can use an adapter that matches your laptop output. For example, a USB-C to HDMI adapter, Mini DisplayPort to HDMI adapter, or VGA cable may work depending on the model.
When using a non-HDMI connection, the steps are still similar. Connect the cable or adapter, turn on the projector, select the right source, and adjust your laptop display settings. The main difference is that some older connection types may not carry audio, so you may need separate speakers if sound is important.
Wireless Display Methods
Wireless setup is useful when you do not want cables across the room. How to connect laptop to projector wirelessly depends on whether your projector supports built-in wireless casting or if you are using an external device.
While the display device supports wireless display, you may be able to connect through screen mirroring or a network casting feature. On your laptop, go to display or cast settings and look for the screen unit name. Once both devices are on the same network or in pairing mode, choose the visual display and allow the connection.
Wireless connection is convenient for small meeting rooms and classrooms, but it can sometimes lag if the Wi-Fi signal is weak. For this reason, wired HDMI is still the most stable option for important presentations. Even so, wireless setup is useful when you need flexibility and a cleaner workspace.
Using Bluetooth for Display Connection
Many users ask about how to connect laptop to projector via bluetooth, but Bluetooth is not usually the main way to send video to a projector. In most cases, Bluetooth is used for sound, remote controls, or accessory pairing rather than full screen display.
In case your projector has Bluetooth audio support, you may be able to pair it with your laptop for sound output. However, the video signal itself usually needs HDMI, Wi-Fi display, Miracast, or another screen-sharing method. So if Bluetooth is the only thing available, it may not be enough for complete projection.
This is an important point because many people expect Bluetooth to work like wireless display. In reality, Bluetooth is slower and not designed for heavy video transmission in most laptop-to-projector setups. It can help in some cases, but it is rarely the full solution.
USB Cable Method
Some projectors support how to connect laptop to projector with usb, but the exact process depends on the projector model. USB can mean different things. In some projectors, the USB port is only for files, firmware, or power. In others, it may support direct display through special software or a USB-C video connection.
If your laptop has USB-C with video output support, you may be able to connect through a compatible USB-C to HDMI adapter or USB-C to display unit cable. If the visual display device supports USB display mode, you may need to install the correct driver or software.
Because USB connections vary so much, it is important to read the projector manual. Do not assume every USB port sends video. Some ports only read flash drives or charge devices. Once you confirm that the projector supports USB display, the connection is usually straightforward.
WiFi-Based Option
Another common method is how to connect laptop to projector via wifi. This is often used when the projector has built-in smart features or when a casting device is attached.
The basic idea is that both devices connect through the same wireless network. Then the laptop sends the screen to the projector through a cast, mirror, or wireless display option. This setup is popular in modern offices because it reduces cable mess and makes it easy for different users to connect.
Still, Wi-Fi projection depends on network quality. If too many devices are using the same network, the connection may become slow or unstable. For smooth results, use a strong Wi-Fi signal and keep the laptop and projector close to the router or access point.
Anycast Device Setup Guide
A useful budget solution is how to connect laptop to projector using anycast. Anycast devices plug into the projector, usually through HDMI, and allow wireless screen sharing from a laptop or phone.
To use it, insert the Anycast device into the display unit, power it if needed, and switch the visual display device to the correct HDMI input. Then connect your laptop to the Anycast network or follow the casting instructions shown on screen. After that, your laptop screen should appear on the screen system
Anycast can be helpful in classrooms, small meeting spaces, and home setups. It is especially useful when the projector does not have built-in wireless support. However, the performance depends on the quality of the device and the strength of the connection.
Windows 7 Instructions
Older systems need a slightly different approach, so it helps to understand how to connect laptop to projector windows 7. Windows 7 still uses display settings that are easy to manage, but the interface looks different from newer versions.
After connecting the cable, press the Windows key and the P key together to open display options. From there, choose Duplicate, Extend, or Projector Only depending on what you need. If the projector does not show up, open screen resolution or display settings and detect the external screen manually.
Sometimes older laptops need updated graphics drivers before the projector works properly. If the display remains blank, restart the laptop after connecting the cable. In many Windows 7 systems, that small step makes the projector appear correctly.
Windows 10 Guide
For many users, how to connect laptop to projector windows 10 is one of the easiest setups. Windows 10 includes built-in display casting and projection options, which makes the process simple.
Once the cable is connected, press Windows and P to open the projection menu. You can choose duplicate to show the same screen on both devices, extend to use the display unit as a second display, or second screen only for presentations. If Windows 10 does not recognize the visual display device at once, open Display Settings and click Detect.
Windows 10 also works well with wireless projection if the hardware supports it. Make sure the display driver is current, because old drivers can create black screens, poor resolution, or sound issues. In most cases, though, the setup is quick and reliable.
For Windows 11 Users
Modern laptops often run the latest system, so many people want to know how to connect laptop to projector windows 11. The process is similar to Windows 10, but the settings layout looks a little different.
After connecting the projector, press Windows and P to open the projection panel. You can then choose whether to duplicate, extend, or show only on the projector. Windows 11 also has improved wireless display tools, so casting can feel smoother on supported devices.
Whenever the display device is not detected, open Settings, go to Display, and look for multiple-display options. Sometimes a fresh cable connection or a restart solves the issue. Windows 11 typically manages display connections efficiently, particularly when using HDMI cables or compatible wireless display devices.
Common Problems and Simple Fixes
Even when the connection is correct, small issues can still happen. The projector may show “no signal,” the screen may look stretched, or the resolution may not fit properly. These problems usually have simple causes.
First, verify the projector’s input source, as this is a mistake users often overlook. If the projector is set to VGA but the cable is HDMI, nothing will appear. Second, inspect the cable and make sure it is not loose or damaged. Third, confirm that the laptop display mode is set correctly.
If the image looks blurry or cut off, change the resolution in your laptop display settings. Projectors often work best at specific resolutions, and using the wrong one can make the image look poor. If there is no sound, remember that some connection types do not transmit audio, especially older adapters and VGA cables.
Quick Comparison of Connection Methods
| Connection Method | Best For | Main Advantage | Main Limitation |
| HDMI | Most modern laptops and projectors | Simple and stable | Needs matching ports |
| No HDMI adapters | Older or mixed devices | Works with older hardware | May need extra adapters |
| Wireless display | Clean setup and mobility | No cable clutter | Can lag on weak networks |
| Bluetooth | Audio or accessory pairing | Easy pairing in some cases | Usually not enough for video |
| USB display | Supported projector models | Useful in special setups | Not all USB ports send video |
| Wi-Fi casting | Smart projectors | Flexible and modern | Depends on network quality |
| Anycast | Budget wireless sharing | Easy add-on solution | Performance varies |
| Windows 7/10/11 projection | PC-based setups | Built-in display tools | Menu steps differ by version |
Tips for Better Projection Quality
A good connection is only part of the job. To get the best display, use a high-quality cable, keep the room dark when possible, and place the projector at the right distance. A clean wall or proper projection screen also improves the final image.
It is also smart to test the setup before your presentation starts. Open the file or slide deck early, check the sound if needed, and make sure the projector is focused. These small steps save time and help you avoid stress when the meeting begins.
FAQs
Can I connect any laptop to a projector?
Most laptops can connect to a projector, but the method depends on the ports and the projector’s supported input type.
Is HDMI always the best option?
HDMI is usually the easiest and most stable option because it carries both video and sound in one cable.
Can I use Wi-Fi instead of a cable?
Yes, many modern projectors support wireless display or casting through Wi-Fi, as long as both devices are compatible.
Does Bluetooth work for projector display?
Bluetooth is usually not used for full video projection. It may help with audio or accessories, but not as the main display method.
Why is my projector showing no signal?
This often happens when the input source is wrong, the cable is loose, or the laptop display settings have not switched to the projector.
How do I connect on Windows 10?
Use HDMI or wireless display, then press Windows + P and choose the display mode you want.
How do I attach on Windows 11?
The process is similar to Windows 10. Connect the device, press Windows + P, and select the correct projection option.
Can USB be used for projection?
Some projectors support USB display, but not every USB port sends video. Check the projector manual first.
What is Anycast used for?
Anycast is used for wireless screen sharing. It plugs into the projector and helps mirror your laptop screen without a direct cable.
How can I make the image look better?
Use the correct resolution, a good cable, proper focus, and a suitable projection surface for clearer output.
Closing Thoughts
Learning how to connect laptop to projector is useful because it gives you more control in office, school, and home situations. Some devices connect best through HDMI, while others need adapters, wireless casting, or special software. The right method depends on your laptop, projector, and the kind of presentation you want to give.
For the most reliable result, HDMI is usually the first choice. Still, it is helpful to understand different connection options, including wireless methods and the setup process on Windows 7, Windows 10, and Windows 11. Once you understand the basics, connecting a laptop to a projector becomes a simple and stress-free task instead of a confusing one.
If you want to read more interesting and detailed guides, visit EmbossitWorld now. You’ll find useful Information, and a lot of practical information. Don’t miss out.


Add comment