
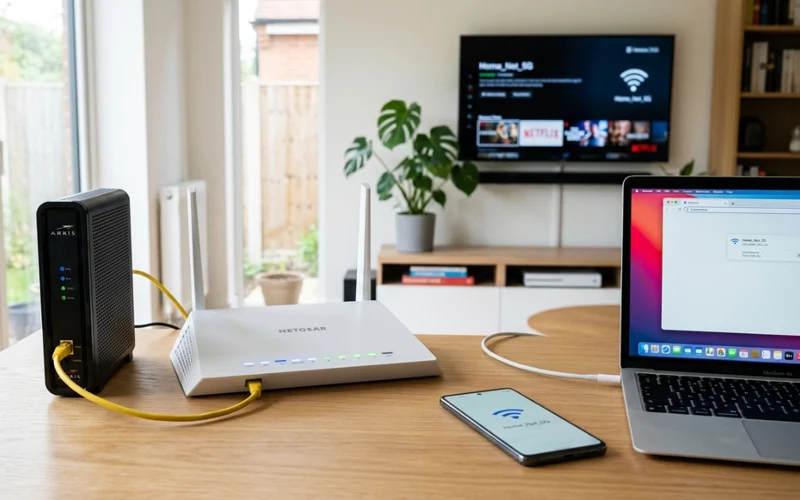
Setting up a router may sound technical at first, but it becomes easy once you understand the basic flow. A router is the device that connects your home devices to the internet and helps create a wireless network for phones, laptops, smart TVs, and other gadgets. If your connection feels weak, your WiFi keeps dropping, or you are installing a new internet service, learning how to set up a router properly can save time and reduce frustration.
Many people think router setup is only about plugging in cables, but there is more to it than that. A good setup gives you stronger coverage, better speed, safer browsing, and fewer connection problems later. It also helps you choose the right mode for your home, whether you are using a modem, sharing internet from another device, or making a router work as an extender or access point.
What You Need Before You Begin
Before you start, make sure you have the network device, the power adapter, an internet source, and at least one device such as a laptop or phone. If your network device is new, check the box for the user manual and default login details. It also helps to keep the modem nearby if your internet service needs one.
If you are learning how to set up a router step by step guide, the best thing you can do is prepare everything first. Choose a central location in your home for the router, as placement has a major impact on WiFi strength. Keep it away from thick walls, microwaves, metal objects, and hidden corners. A clear and open space usually gives better signal.
Step 1: Connect the Hardware
Start by placing the router on a flat surface and connecting the power adapter. Wait until the router lights turn on and stabilize. If your internet service uses a modem, connect one end of the Ethernet cable to the modem and the other end to the router’s WAN or Internet port. This is the most common setup used in homes.
In case you are wondering how to set up a router and modem, the process is usually simple. The modem brings the internet into your home, and the router spreads it to your devices. Once both devices are connected, turn them on in the correct order. In many cases, you should power on the modem first, wait a minute, and then power on the router. This small step can help the devices recognize each other more easily.
Step 2: Check Device Lights
After connecting everything, check the indicator lights. Most network devices have lights for power, internet, WiFi, and Ethernet ports. These lights tell you whether the network device is working correctly. If the internet light stays off or red, the connection may not be ready yet, or the modem may need to be checked.
This part is often ignored, but it is useful because the lights can save you from unnecessary guessing. If the power light is on and the WiFi light is active, the router is usually running. If the internet light is not stable, wait a few minutes before making changes. Sometimes the connection just needs time to establish itself.
Step 3: Connect to the Network
Now use your phone, laptop, or tablet to find the default WiFi name printed on the router label or in the manual. Connect to that network first. Some routers also allow a direct Ethernet connection to a computer for setup, which can be useful if you want a more stable link while making changes.
This is the point where many users begin the real setup process. You are not finished yet, as the router still needs a custom name, password, and security settings. But joining the network is the first step in opening the router’s control page.
Step 4: Open the Settings Page
To access the router settings, open a web browser and type the router’s IP address or the setup address written in the manual. Common addresses include 192.168.0.1 or 192.168.1.1, though this can vary by brand. After that, log in with the default username and password.
Once inside the settings page, change the admin login if the network device allows it. Keeping the default admin details is not safe. It is better to choose a strong password so other people cannot easily access your network device settings. This protects your network from unwanted changes.
Step 5: Set WiFi Name and Strong Password
One of the most important parts of learning how to set up a router for wifi is choosing a network name and password that are easy for you to remember but hard for others to guess. Pick a WiFi name that makes sense for your home, and create a password that includes letters, numbers, and symbols if possible.
A strong WiFi password helps protect your internet from unauthorized users. It also keeps your network more stable, because too many unknown devices can slow down your connection. If your router provides separate names for the 2.4 GHz and 5 GHz bands, you can either keep both or combine them based on your requirements. The 2.4 GHz band usually covers a larger area, while the 5 GHz band often gives faster speeds at shorter distances.
Step 6: Choose the Right Security Mode
Modern routers usually offer security options such as WPA2 or WPA3. These are much safer than older options like WEP. Select the strongest security mode your devices support. This helps secure your network from unauthorized access and keeps your data safer while you browse, stream, or work.
This step may seem small, but it matters a lot. Many people set up a router quickly and forget about security, which can lead to weak protection later. A secure network is an important part of a reliable home connection.
A Quick Setup Overview
Below is a simple table to help you quickly understand the main stages of setting up a router.
Setup Stage | What You Do | Why It Matters |
Physical connection | Plug in the router and connect it to the modem if needed | This brings the internet signal to the router |
Network access | Join the router’s default WiFi or connect by cable | This lets you open the settings page |
Login | Enter the router admin page | This gives you control over network settings |
WiFi setup | Change the network name and password | This makes your network personal and secure |
Security | Choose WPA2 or WPA3 | This helps protect your home network |
| Final test | Check the internet on your devices | This confirms the setup is working |
Setup Without a Modem
Not every setup needs a modem. In some homes or offices, the router may connect directly to another internet source such as an Ethernet wall port, fiber ONT, or existing network line. If you are searching for how to set up a router without a modem, the main idea is to connect the router to the internet source you already have instead of using a separate modem.
In this type of setup, the WAN or Internet port on the network device may connect to the wall Ethernet port or to a fiber device provided by the internet company. After that, you can log in to the network device and configure the WiFi name and password the same way as a normal setup. This is common in apartments, offices, and buildings where internet is already distributed through the property.
Using Device as an Access Point Mode
Sometimes you do not need a router to create a new internet connection. Instead, you may want to use it to expand an existing wired network. That is where how to set up a router as an access point becomes useful. In access point mode, the router does not act as the main network manager. It simply helps extend WiFi coverage from a main router or network switch.
To do this, connect the second device to the main device using an Ethernet cable, then turn off the DHCP server on the second device if your device model requires it. Set a WiFi name and password, or use the same network name if you want smoother roaming across the house. This setup is often helpful in large homes, offices, or places where one device cannot cover every corner.
Converting into a WiFi Extender
If your current WiFi signal is weak in some rooms, you may use an old router as a range extender. This is different from an access point because the extender usually connects wirelessly to the main router and rebroadcasts the signal. Many users search for how to set up a router as an extender when they want improved coverage without purchasing a new device.
The exact steps depend on the router model, but the general idea is to place the second router where the main signal is still strong enough, then turn on repeater or extender mode if available. After that, connect it to the main WiFi network and save the settings. Keep in mind that an extender can reduce speed a little, because it has to receive and send the signal at the same time. Still, it is often a practical fix for dead zones in the home.
Better Speed and Coverage Guide
A router is not only about getting online. A proper setup also improves performance. Place the WiFi device in the middle of your home if possible, not on the floor and not hidden behind furniture. Try to keep it in an open area with fewer obstacles. If your network device supports dual-band or tri-band WiFi, use the band that fits your needs best.
When many devices are connected at once, speed may drop. That does not always indicate that the router is faulty. It may just be handling a lot of traffic. In that case, you can update the firmware, restart the router from time to time, or change the WiFi channel if there is heavy interference from nearby networks. These minor improvements can make a significant difference in everyday usage.
Common Configuration Issues
A lot of router problems start with small setup mistakes. Some people place the WiFi device in a corner and then wonder why the signal is weak. Others leave the default password unchanged, which creates a security risk. Some users forget to save the settings after making changes, so the network device keeps the old configuration.
Another common mistake is changing too many settings without understanding them. That can cause confusion later. It is better to make simple, clear changes first and test the connection after each one. If something goes wrong, you can always reset the router and start again.
Troubleshooting Basic Problems
Assuming that the internet does not work after setup, begin with the cables. Check whether the modem is connected properly and whether the Ethernet cable is inserted into the correct port. Restarting the modem and router can also solve many issues. Unplug both devices, wait about one minute, then turn the modem on first and the router second.
When to Use Access Point Mode
Some homes already have a main internet device provided by the internet company, but the signal does not reach every room. In that case, setting a second network device as an access point can be a smarter choice than using it as a separate router. This keeps the network simpler and helps devices remain connected while moving around the home.
Access point mode is especially useful if you already have wired internet running through the building. It gives you stronger and more stable coverage without creating a second separate network. That can make life easier for families, students, and people who work from home.
FAQs
1. What is the easiest way to follow a how to set up a router step by step guide?
The easiest way is to start by connecting the device to power, then linking it with your internet source, and finally opening the settings page to configure WiFi name and password. Doing it step by step makes the process smooth and reduces chances of errors during setup.
2. Why is my router login page not opening?
This usually happens when the device is not properly connected to the network or the IP address is typed incorrectly in the browser. Restarting the connection and checking the correct address often solves the issue quickly.
3. What do blinking lights on a device mean?
Blinking lights typically indicate activity such as data transfer, connection setup, or signal searching. Each light has a different meaning depending on the model, so checking the indicator guide helps understand the status better.
4. Where should I place my router for better signal strength?
The best place is usually a central, open area in the home. Keeping it away from thick walls, metal objects, and hidden corners helps improve coverage and reduces weak signal zones.
5. Why does WiFi show connected but no internet access?
This issue can occur due to service interruptions, incorrect configuration, or temporary network glitches. Restarting the system and checking the main internet source usually helps fix it.
6. How can I improve WiFi range in a large house?
Improving range can be done by repositioning the device, reducing obstacles, or using additional networking equipment to extend coverage. Proper placement plays a major role in overall performance.
7. How do I change my WiFi password safely?
You can change it through the settings page by logging in with admin details and updating the wireless security section. Always choose a strong password that is hard to guess but easy for you to remember.
8. How can I secure my home internet network from unauthorized users?
Using strong encryption, changing default login details, and regularly updating settings helps improve security. Keeping software updated also reduces risks of unwanted access.
9. Can I complete how to set up a router without a modem at home?
Yes, it is possible in many modern internet setups. Some connections use an Ethernet wall port or fiber box instead of a separate modem. In such cases, you can directly connect the device to the available internet source and configure it through the admin page.
10. Why is my router internet speed slow even after setup?
Slow speed can be caused by distance from the device, too many connected users, or interference from other electronics. Changing the placement and reducing unnecessary connections can often improve performance.
Last Thoughts
Learning how to set up a router is one of the most useful home tech skills you can have. Once you understand the basic process, you can install a new router, improve your WiFi, use an old router in a better way, or fix weak coverage in your home. The key is to move step by step, keep the settings simple, and choose a secure password from the start.
Whether you are setting up a router with a modem, configuring it for WiFi, or using it in advanced modes like an access point or extender, the main goal remains the same: to improve your home network performance. A proper setup not only makes your connection more stable but also helps you avoid common network issues in daily use.
If you want to read more interesting and detailed guides, visit EmbossitWorld now. You’ll find useful Information, and a lot of practical information. Don’t miss out.





Add comment